Unique Event Confirmation Email, Preview PDFs, Additional Committee Details Display, and More
Unique Event Confirmation Email, Preview PDFs, Additional Committee Details Display, and More
Updated 3-1-2024
The following release notes showcase upcoming changes and improvements to your GrowthZone software is available on March 5, 2024.
In this article:
- Event Confirmation Email improvements
- Preview PDF/Docs in Info Hub Resources
- Updates and Improvements to List/Committees
- Enhanced Features and Email Deliver-ability Improvements
- Billing Responsible Party Feature
- QuickBooks Online Integration Updates
Watch a 2 minute video giving a quick overview of these features. View video.
Event Confirmation Email Improvements
Unique Attendee Confirmation Emails per Event
Introducing a highly requested improvement: personalized attendee confirmation emails! Many of you have expressed the desire to customize the email sent to attendees for each event, and we've listened. Now, you have the power to control the entire content of the confirmation email per event by selecting your own email template.
Here's how to do it:
- Go to the Attendee Setup tab on the event where you want to customize the confirmation email.
- Scroll down to the Attendee Messaging section.
- Select a Confirmation Email Template from the drop-down list.
The Email Template selected here will be sent to registered attendees instead of the email template listed under Setup, Automated Messaging for “Registered Event Attendee”. Also note that the From email address on your selected template will be used as who the email is from.
The confirmation message under Attendee Messaging still will be displayed. This message has always displayed on-screen when the registration is complete. That continues to be the case whether the override template is selected or not.
The selections you make are displayed in the Attendee Messaging section as a quick visual of your choices, saving you from having to click in if you recognize the template or wording as the expected information.
Here is a video about setting up a unique confirmation email on your own. View video.
Unique Sponsor Confirmation Emails per Event
 Just like the unique attendee confirmation email that can now be specified, you can also specify a unique sponsor confirmation email per event.
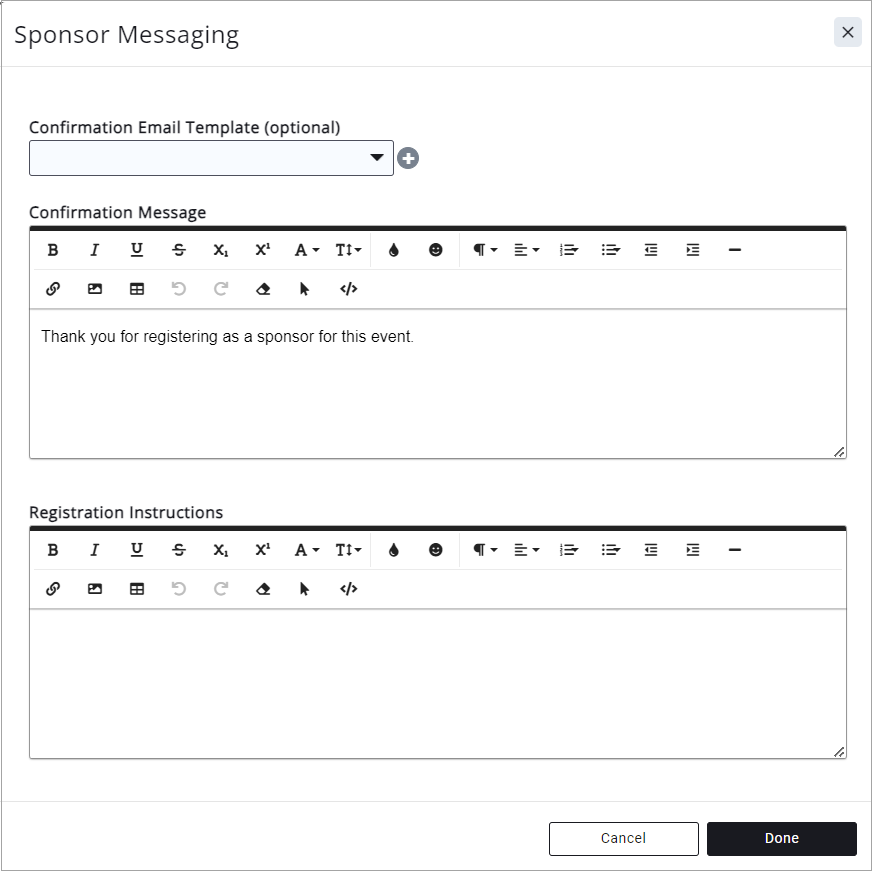
To make this happen:
- Go to the Sponsor Setup tab on the event where you want to have your own confirmation email.
- Scroll to the bottom and click into edit the Sponsor Messaging section.
- Select a Confirmation Email Template from the drop-down list. Click Done.
The Email Template selected here will be sent to registered sponsors instead of the email template listed under Setup, Automated Messaging for “Registered Event Sponsor”.
In addition, just like the attendee, the Sponsor Confirmation message still will display on-screen when the registration is complete. That continues to be the case whether the override template is selected or not.
Exhibitor Confirmation Email Improvements
- Exhibitor confirmation emails will now send to the exhibitor registrant, even if no attendees are included with the exhibitor registration. The confirmation email is sent to the exhibitor email address.
- If registering an attendee(s) on an exhibitor registration, you’ll find that each registration type (exhibitor and attendee) will now receive a confirmation email (if their email address is entered). In the past, the exhibitor and the first attendee were combined into a single exhibitor email but it never sent any attendee information. The impression was that attendee information was being inserted into the exhibitor email but that was not happening so this solution was created.
- The Exhibitor confirmation email template now includes the Exhibitor Registration ID instead of the Attendee registration ID. Not every exhibitor registration includes attendees, so having the attendee registration ID as part of the default exhibitor template was not providing correct information in all cases.
Miscellaneous Event Confirmation Improvements
While working in the confirmation email code, we also cleaned up bugs and made other small improvements.
- Just like attendees, you can now set a default Sponsor confirmation message that will show up on all events. For example, you might want to at least have an on-screen ‘Thank you for registering as our sponsor.” listed as the default message. Then if you don’t change it yourself, you’ll at least have a simple thank you message in place. Create your default sponsor confirmation message under Setup, Event Settings. Find the box titled “Default Confirmation message for Sponsors” and enter your desired message there. It will appear as the Sponsor Confirmation message on any event where the Sponsor Confirmation message is blank.
- Sponsor Registration Instructions are now available, just like you have for Attendees and Exhibitors. Whatever you put in this field will display above the Sponsor registration types on the public form - allowing you to guide your registrants to which sponsorships will best match their desires.
Preview PDFs/Docs in Info Hub Resources
Resources Users Can Preview Doc before Download
 Filling your Info Hub Resources with great documents, images and PDFs can be a great tool for your members and other Info Hub users, providing them with instructions, forms, logos, and association-specific documents.
One hesitation your members might find is being unsure by the name or description whether this resource is the one that you want to download. Available now is a preview option prior to committing to the download.
Find the preview in the List view, Card view and on the resources' details page.
File types that will display a preview are .pdf, .doc, .docx, .xlsx, .xls, .txt, .cvs and basic image types like .jpg, .jpeg, .img, .png, and .gif.
.PDF and .TXT files will show the full document in a window where you can scroll through the document prior to download. The other file types will show a screen shot of the first page.
Updates and Improvements to List/Committees
New columns display in the Info Hub
 Committee lists that are displayed to other committee members will now display more specifics about the members of that committee, such as:
- Join Date
- End Date (formerly Drop Date)
- Role
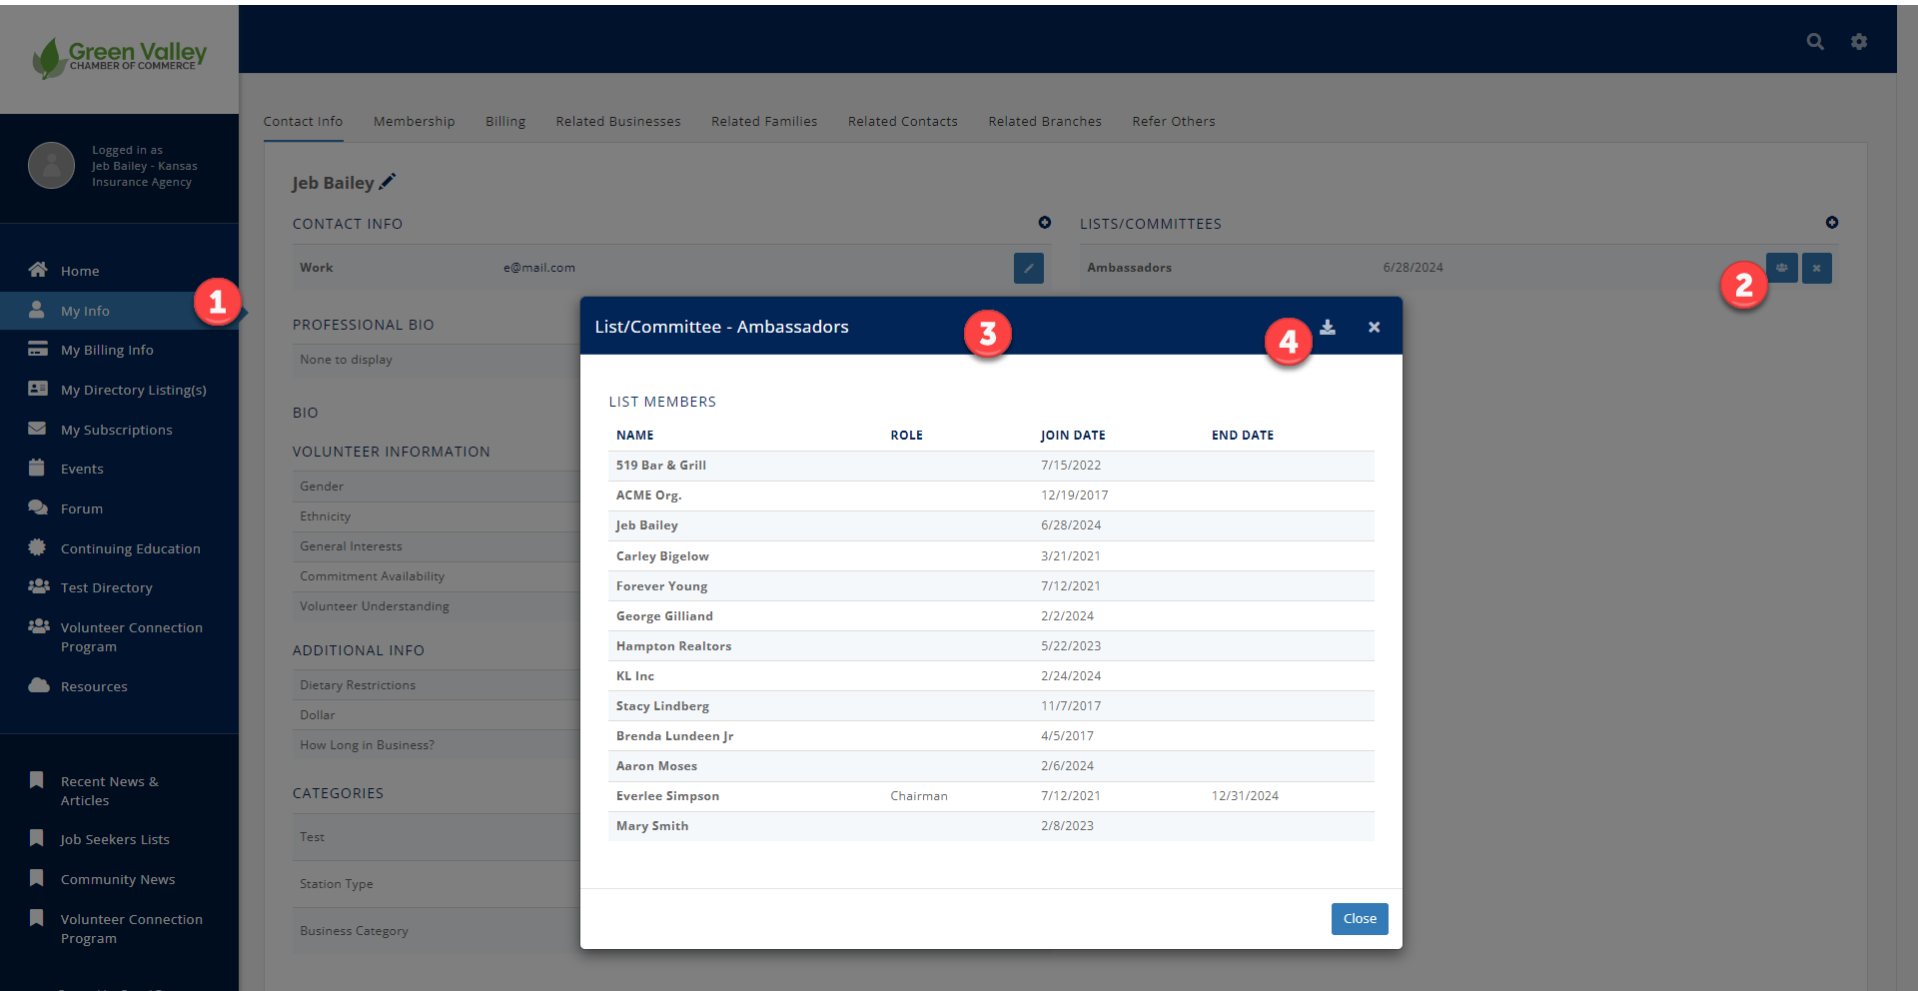
Find visible List/Committees in the Info Hub by:
- Clicking My Info (circle #1),
- Click the group icon in the Lists/Committees section (circle #2), then you’ll see the contacts list (circle #3).
- You can also click the new Download button (circle #4) to get a copy of the list with all the columns.
Watch a video showing how this all works together.
Remember that the Lists/Committees that show in the Info Hub are chosen by the staff. The only people who can see the lists/committee are those that belong to the committee. Once their End Date is reached they are no longer active in the committee and that committee member is no longer displayed in the Info Hub list. See details on how to setup your Lists/Committees to show them in the Info Hub. See KB article.
List/Committee Drop Date Now End Date
 The List/Committee Contacts tab has a column that was previously called Drop Date and is now called End Date. This new column title is changed on-screen in the Contacts tab and also the download. The Contact Lists/Committees report already had that field named End Date.
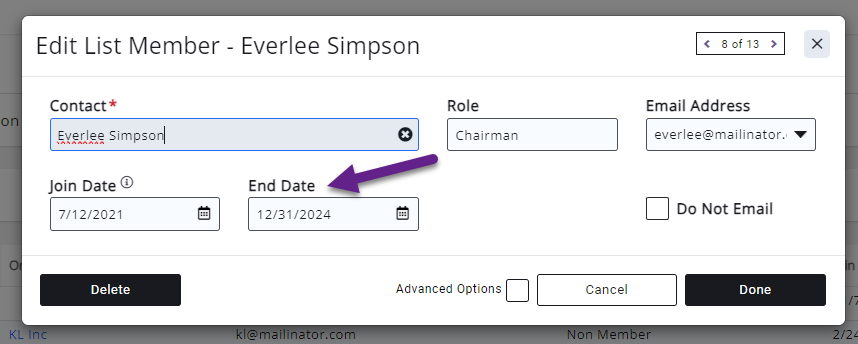
The new End Date column name fits better with the purpose of that field - to indicate the end date of the committee member, whether today or in the future.
A common use of this field will be to indicate the end of the term that a committee member has. For instance, I’ve got a committee chair person that will be done with their term at the end of the year. I can put the List/Committee End Date of this contact at the year-end date, which can then display for others as well if the committee list is one that displays in the Info Hub. See KB article and look for “Users on List can view other Users on List”
Setting List/Committee Member as Inactive
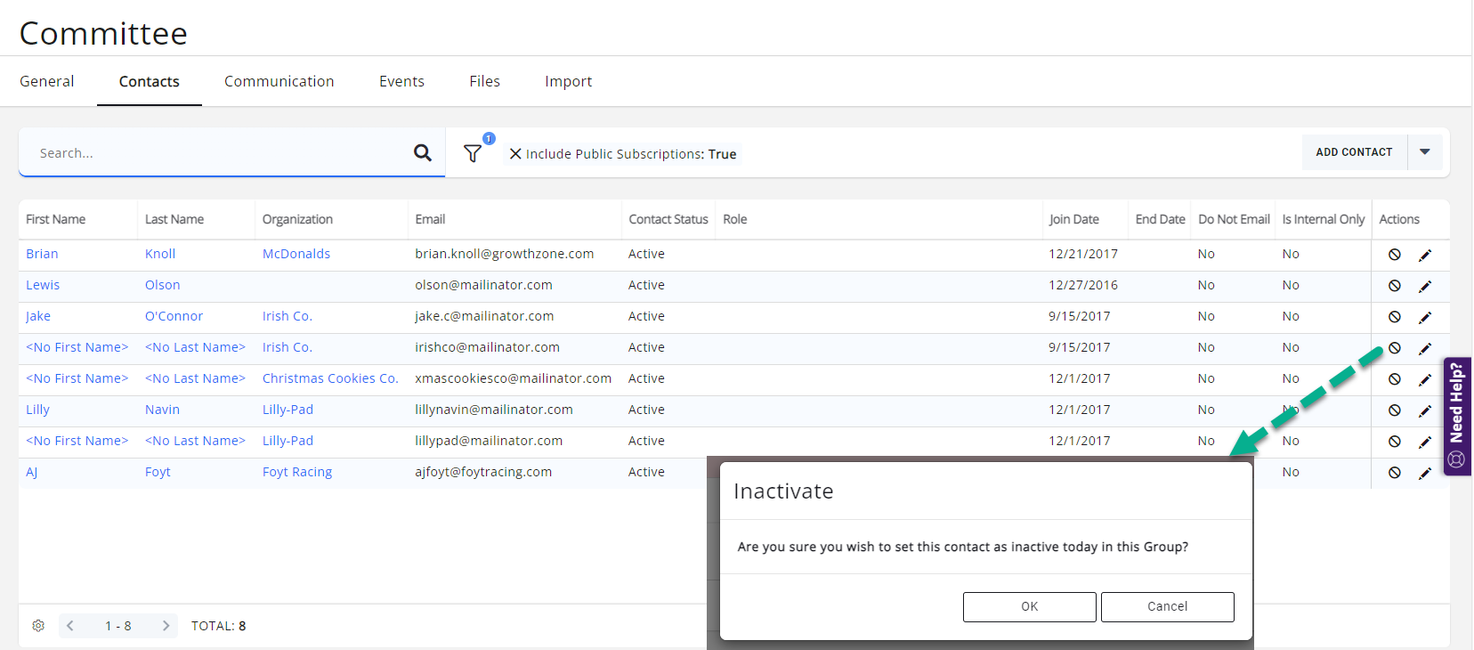 You’ll also notice that the way you change a contact to Inactive is to click the Inactivate icon in the Actions column. This will change the contact immediately to inactive, putting an End Date of today’s date. To set a future End Date, click the Edit icon and enter your desired date.
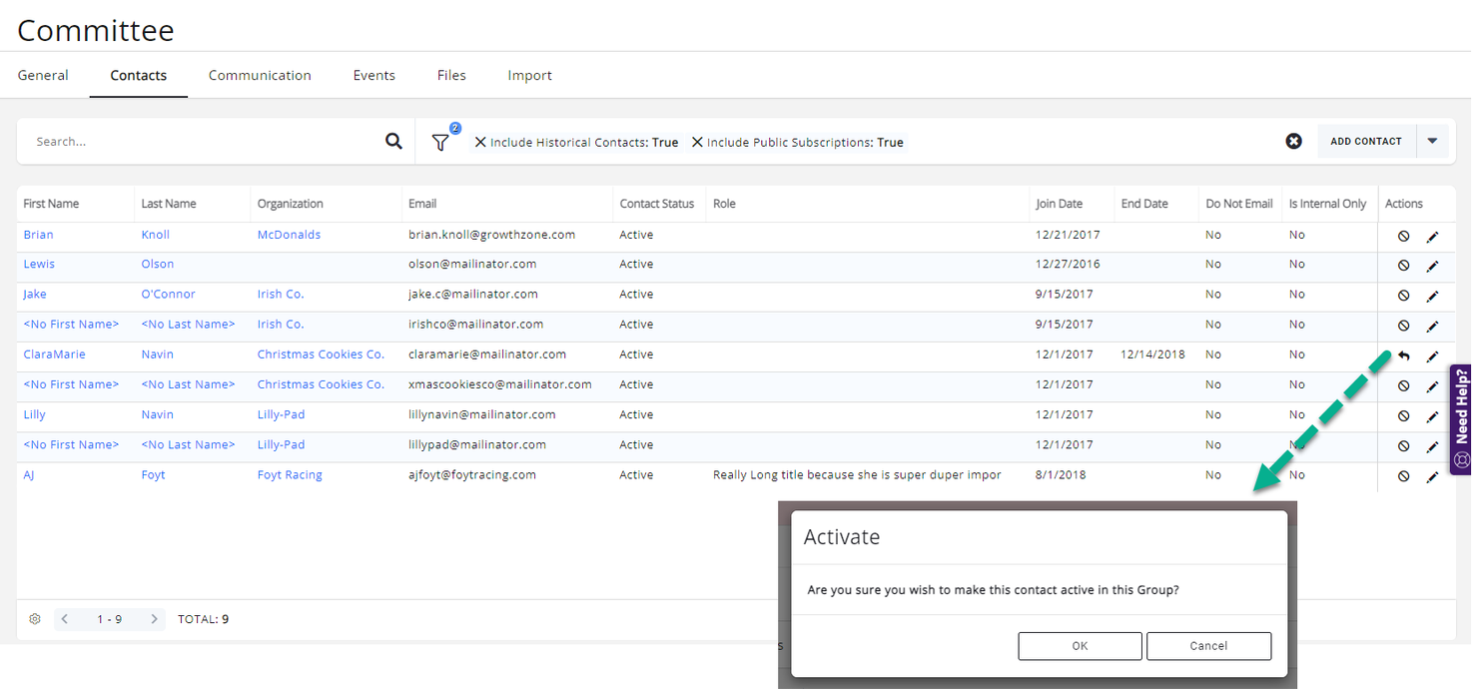 If you wish to return the inactive contact back to active status, change your filter to “Include Historical Contacts”. You’ll see the return icon (Reactivate) on contacts that could be brought back to active status.
Billing Responsible Party
Assign membership billing to someone other than membership owner
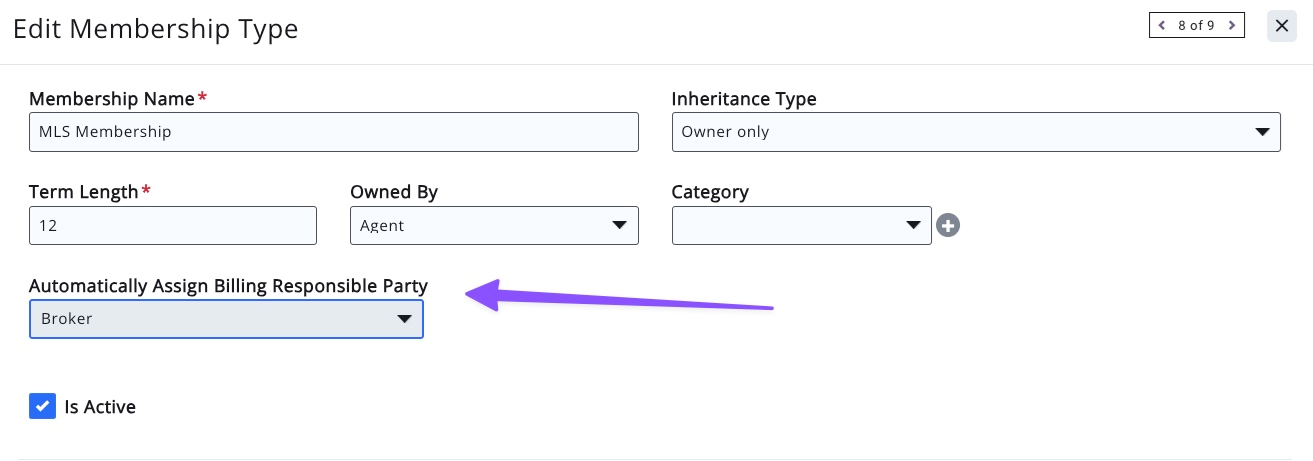 We are excited to announce a new feature for membership billing - Billing Responsible Party. This new feature will allow you to assign membership billing to someone other than the membership owner. A real estate association may wish to bill a broker or office manager for an agent’s MLS or lockbox membership dues. A medical association might choose to bill a doctor’s membership to the hospital instead. These scenarios and more are now possible thanks to Billing Responsible Party.
This membership level setting will allow you to easily automate the Billing Responsible Party on individual memberships. Watch a short video.
For more information, please visit our Knowledge Base:
Real Estate Edition: View Knowledge Base
Other Associations: View Knowledge Base
Relators, check out more information in our “What’s New for Realtors?” webinar: View webinar details and register here.
Enhanced Features & Email Deliverability Improvements
With the recent bulk email sender requirements, all eyes have been focused on making sure that recipients receive emails. With that in mind, several improvements have been made within the email communication workflow to ensure the best deliver-ability rate for our customers. Watch a 3 1/2 minute video to explain the updates described in this section. Watch video.
Improved support for all email domains
 GrowthZone has always had great flexibility in allowing your association to send from any email address that you desire.
For example, you can send your association members an email from susan@myassociation.org and then turn around and send your foundation members an email from susan@myfoundation.org - - all using the same familiar GrowthZone options, but simply changing your “From” email address. Easy. Flexible.
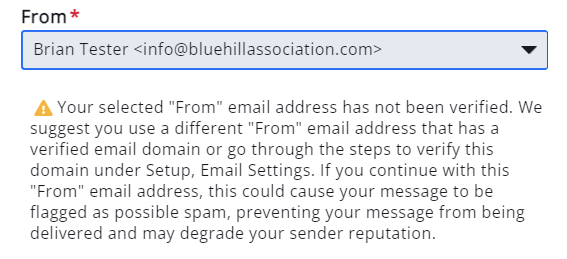
If the email domain in your From address has not passed the GrowthZone DNS verification process, the staff that sends the email will see an on-screen warning that using this “From” address is not a good idea. These emails will likely end up in the spam folder.
The sender should follow the on-screen instructions, letting them know they should go through the steps to verify their domain before proceeding.
This will ensure that the new sender requirements are met on all emails sent through GrowthZone.
More DNS configuration feedback provided
 Verifying that your configuration has all the proper entries for email communication to be successful has long been a part of the GrowthZone’s setup process.
To verify your email DNS, you’ll go under Setup to the Email Settings. Once your DNS entries are modified and you click the “Verify Email Domain DNS” button, you’ll now see a visual indicator of the domain status. See first image below.
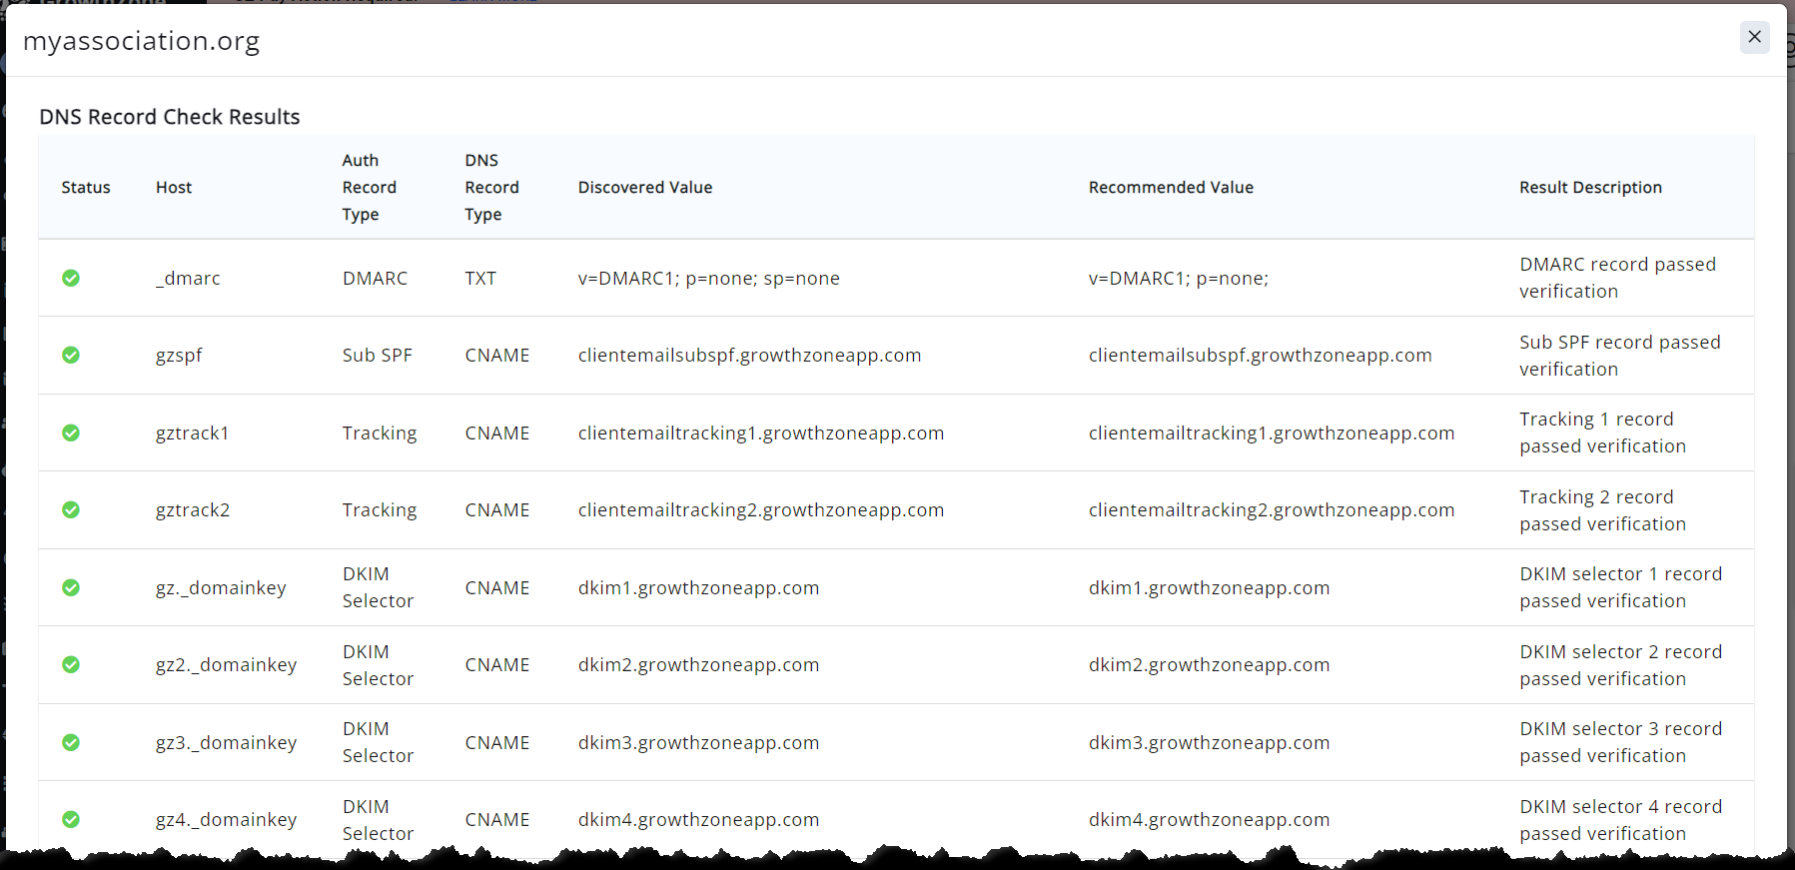
Clicking in to “View Verification results” will show the results, line by line, with pass/fail feedback for each entry. See second image below.
Our Customer Service team is still here to help interpret and guide if needed, but for those who have their own IT department, the new feedback provided here will let them be more self-sufficient when it comes to getting their email domains properly setup.
Periodic Email Domain DNS Re-verification
With our ever-changing world of technology we know that adjustments to your DNS entries might occur after the initial verification.
To protect your sender reputation, we have built-in a periodic recheck of your DNS entries.
Each year, 365 days from your last DNS check, we will run the verification process again on your behalf. An email will be sent to the subscribers of the notification called “Email Domain Verification Pass/Fail”. The Email Domain DNS verification results will show in this email and let you know if action is needed on your part.
If you miss the email, you’ll always have the on-screen warning message when you try to send from the unverified email domain. See “Improved support for emails” article above.
On-screen messaging about ‘generic’ email domains
A variety of messages appear on-screen that will remind staff about the challenges that exist if they try to send email from a ‘generic’ email domain.
- “From” address message - The warning message that appears when sending from a ‘generic’ email domains (i.e. yahoo.com, gmail.com, mailinator.com etc) has been moved up higher on the screen and is formatted with a yellow exclamation point. The message is not new, but it will probably get more attention now that it displays immediately below the “From” address selection.
- Domain validation message (Under Setup, Email Settings) - All email sending domains will now be included in the list of Email Domains, including ‘generic’ domains like yahoo.com, gmail.com, mailinator.com and others. These are domains where your IT department does not have any access to modify the DNS records of that domain. Thus these domains will be marked as “Not eligible for verification”. Clicking to “View Verification Results” will display information about why and a suggestion to use an email domain that is a known verified domain for your association.
Other DNS Verification Updates
IP Flattening service - Customers whose DNS entries are not able to use our recommended “Include” statement from our DNS Requirements list but instead are using an IP flattening service in order to get the required IP addresses into the DNS record will now be able to receive a successful verification message when using the “Verify Email Domain DNS” button.
QuickBooks Online Integration Updates

Updated Connect Button
Be on the lookout for new branding in the setup area for QuickBooks Online. When connecting to QuickBooks, the button now reflects QuickBooks branding that you are already familiar with.
QuickBooks Online Integration Error Logs
We've heard your feedback and have made improvements to the error logs in the QuickBooks Online integration. We have updated some error language to be more concise and user friendly. We have also added some additional protections to reduce the frequency of sync errors caused when servers may be busy.